


SSH Key reinstalls on the One VPS platform
- You can reinstall your VPS and select to install it with SSH key log in.
- Navigate to the SimplyHosting website and log into your client portal area by selecting the “Customer Portal” link at the top right-hand of the page:

- Once logged into the portal click on the “VPS” heading tab at the top of the site:

- Click on “Manage” to the right of the server you wish to reinstall:

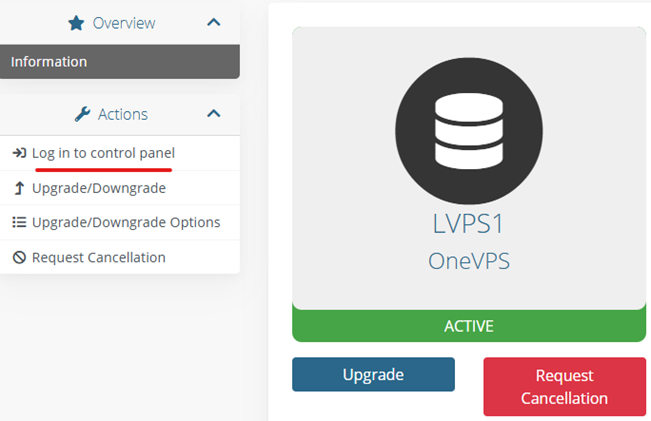
- Click on “Log in to control panel” in the “Actions” menu to the left:
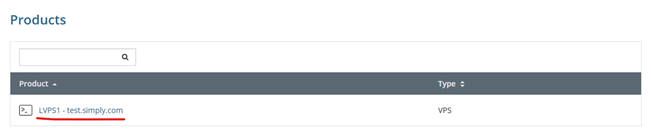
- Click on the server you want to reinstall within the “Products” section:
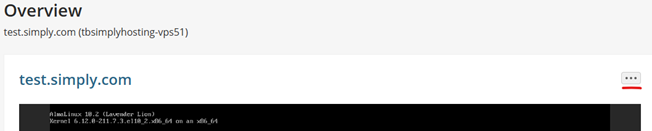
- Click on the three dots to the top right of the console window and select “Reinstall OS”
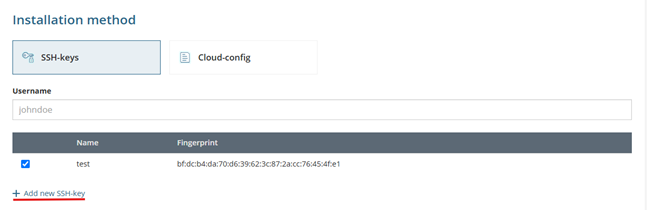
- On the following screen where it lists all the OS options, scroll down to the “Installation Method” section and make sure SSH-Keys is selected.
- Click on “+ Add new SSH-key”
- At this point we will want to generate an SSH key.
- You will need the PuttyGen Application for this, you can download it at: https://www.chiark.greenend.org.uk/~sgtatham/putty/latest.html
- Please download the version for your specific OS, you will most likely want 64-bit x86. In this guide we will be showing/using the standalone executables listed in the “Alternative binary files” section of the webpage rather than the installation package version.
- Once downloaded, please open the puttygen.exe executable file.
- Select the type of security (the options along the bottom) you wish to set for the key and then click on “Generate”.
- Move your mouse around in the blank space until the key generates, you should see something equivalent to the below example once it has finished:
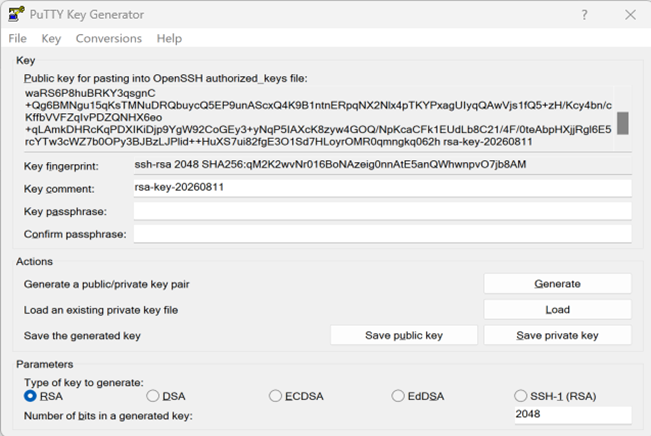
- (Optional) Add a password into the “Key passphrase:” section and “Confirmation passphrase:” boxes if you want to add one for this key pair.
- Click “Save public key” and save it to a location on your local PC with a sensible filename that you would be able to find later.
- Click “Save private key” and save it to a location on your local PC with a sensible filename that you would be able to find later.
- Highlight the entire key from the box at the top:
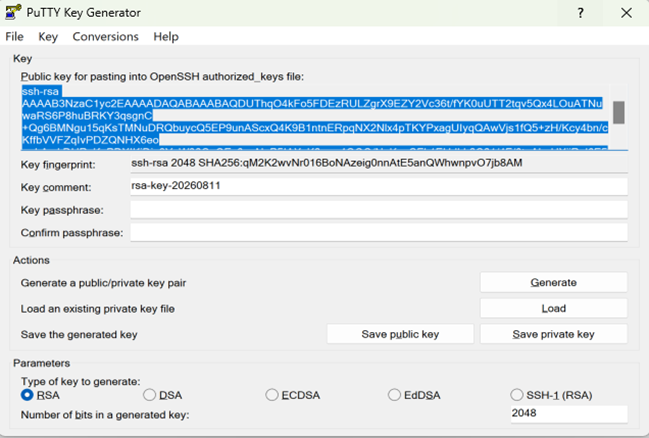
- Hit the keyboard shortcut Ctrl+C or right click on the highlighted text and select “Copy” from the menu.
- Now go back to the portal where we were about to add the key to the install, we should still be on the SSH key section. Click on the “+ Add” button:

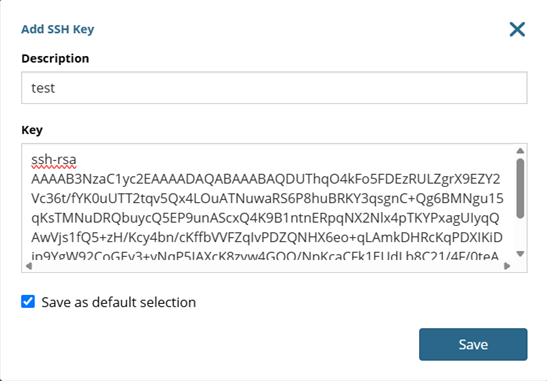
- Write a description that makes sense for you into the “Description” field. You can then paste key we copied from PuttyGen earlier into the “Key” field by left clicking into the box and then using the short cut Ctrl+V or right click in the box and select “Paste”. Tick the “Save as default selection” if this is to be your default key and click the “Save” button:
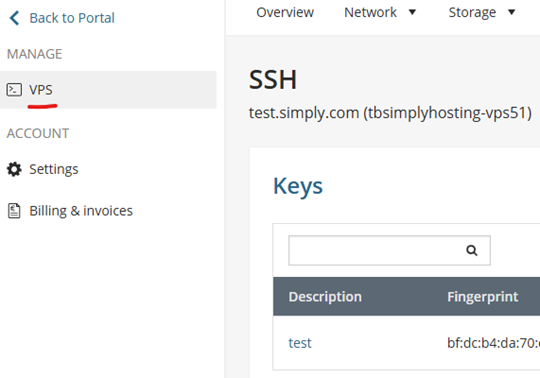
- Navigate back to the “Reinstall OS” section of the control panel for the server you wanted to reinstall by clicking on “VPS” in the “Manage” section on the right of the page and then following steps 6 and 7 in this guide again:
- Highlight the OS you want to install and select the version from the drop-down box below that OS name, in this example guide I have opted for Alma version 10:
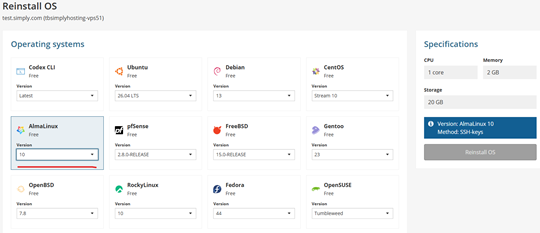
- Scroll down and type into the “Username” field whatever you wish for your username to be for the server log in account, in this example we are just setting this up with the root user account:

- Scroll back up slightly and click on “Reinstall OS” button on the right-hand side:
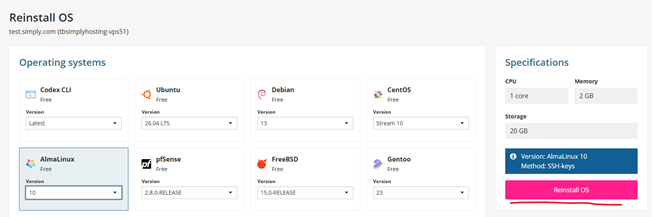
- This will now go ahead and reinstall the OS selected onto the server. Once complete you connect to the server using putty.
- Again, if you do not have this application, you can download it at the following web page: https://www.chiark.greenend.org.uk/~sgtatham/putty/latest.html
- Again, please download the version for your specific OS. Please choose the same version you chose for PuttyGen (most likely the 64-bit x86). In this guide we will be showing/using the standalone executables listed in the “Alternative binary files” section of the webpage rather than the installation package version.
- Once downloaded, please open the putty.exe executable file.
- Expand the “Connection -> SSH -> Auth ->” menus and select “Credentials”:
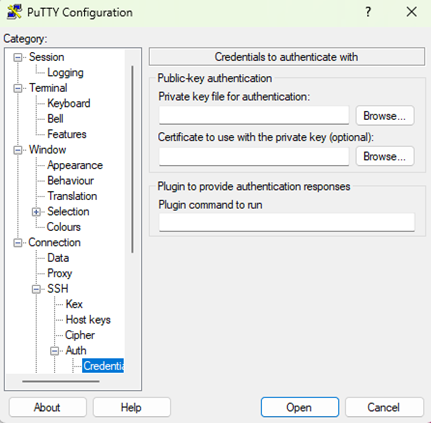
- Click on the “Browse” for the private key import (the top one of the two “Browse” buttons).
- Navigate to where you saved the private and public keys earlier.
- Select the private key and then Click the “Open” button:
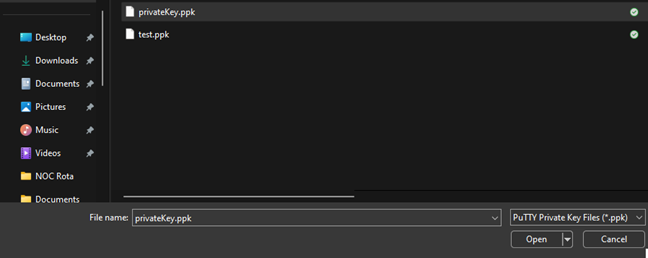
- Click on the very top option on the left-hand menu: “Session”:
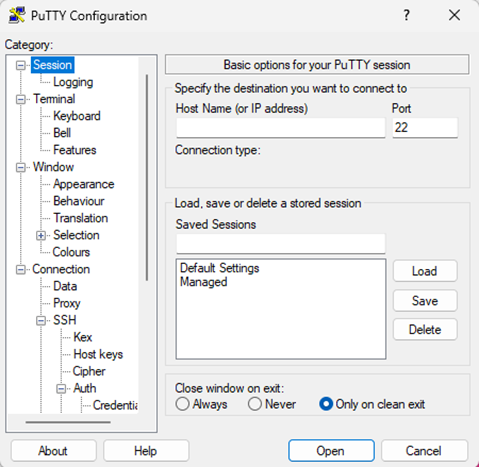
- Type the IP address of the server into the “Host Name (or IP address)” field.
- (Optional) if you wish to save these connection details for use later you can type something into the field just below where it says “Saved Sessions” that will remind you of what these details relate to and then click on “Save” on the right. The name you just typed should now appear in the box just below.
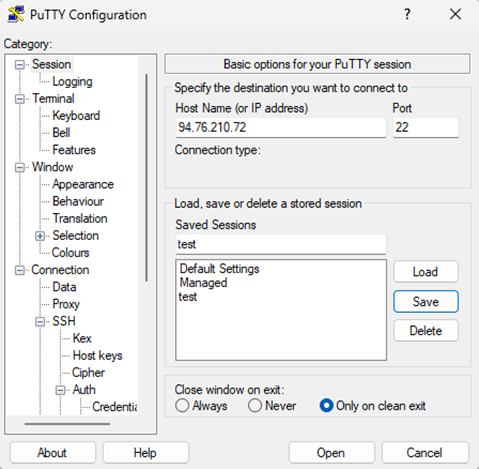
- Click “Open to connect to the server.
- Type the username you chose when you reinstalled the server and hit the “Enter” key, you should now be logged in unless you set a passphrase when generating the key pair. If you did set a passphrase then please proceed to the next step.
- (Optional) Type the passphrase you selected when you created the key pair if you set one and hit the “Enter” key:

- You should now be logged into the server.