

How to install Fail2Ban on a Plesk server.
OS supported: Linux
Installation method: Plesk UI
- Log into Plesk via https://XXX.XXX.XXX.XXX:8443 (the X’s represent the IP address of your server).
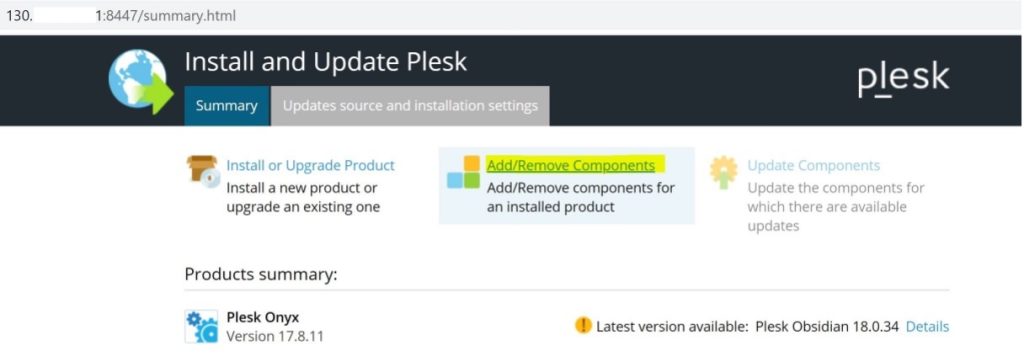
- Navigate to Tools & Settings > Updates & Upgrades (please note it might take a little while for the page to load).
- Click on “Add/Remove Components“, as you can see below;
4. Click on “Fail2Ban” and choose “Install“, as shown in the following screenshot;
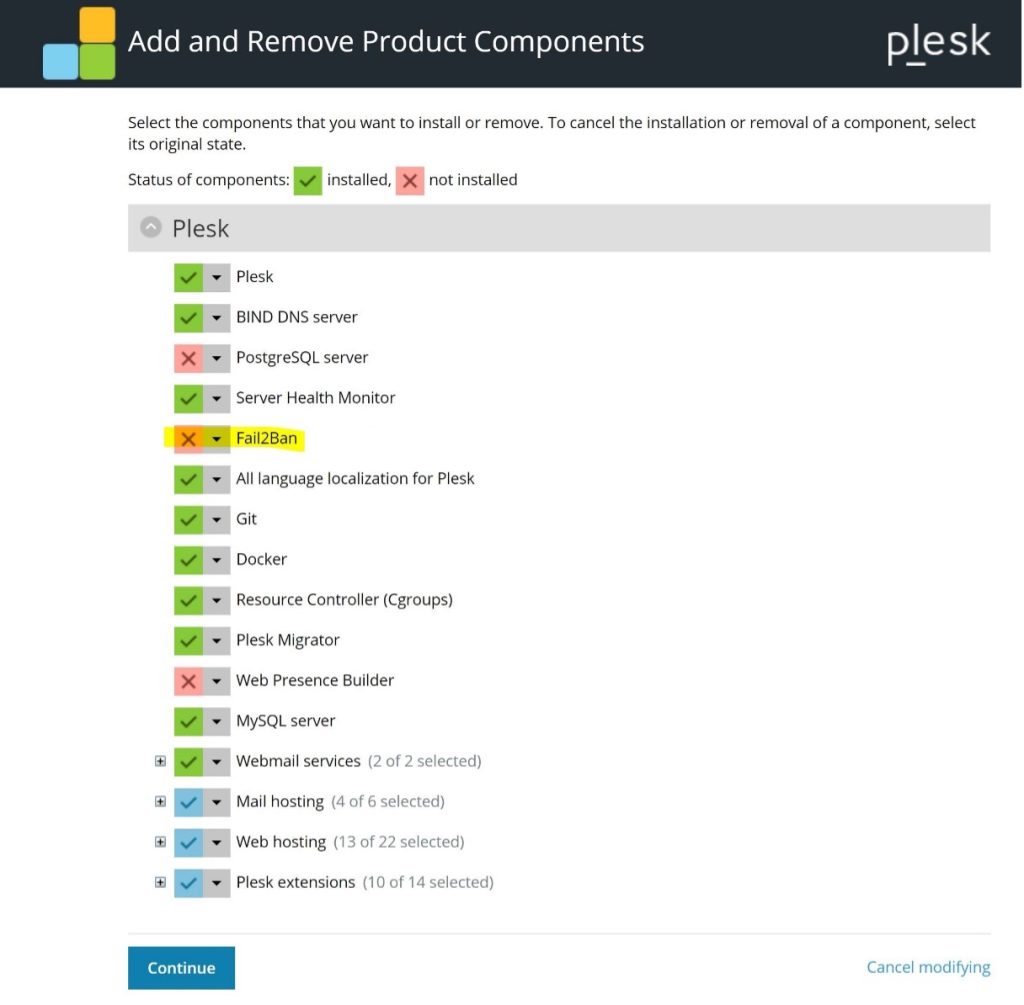
5. Click on “Continue” to initiate the installation.
6. Once it has completed, you should be able to access Fail2Ban via Plesk > Tools & Settings > Address Banning (Fail2Ban).
However, it needs to be enabled to start protecting specific services (daemons) of your server, so please follow these steps to enable it.
Get in touch
If you need advice on Fail2Ban, we’re here to help.
Call us on 0333 247 0222: Monday – Friday, 9am – 5.30pm.
Chat with us on LiveChat: Monday – Friday, 9am – 5.30pm.
Write to us: Send us a support ticket from your Simply portal and we’ll get back to you as soon as we can.
If you don’t have an account with Simply Hosting yet, you can also send our Sales team an enquiry and we’ll get back to you between 9am and 5.30pm, Monday to Friday.